Clearlight is a cinematic reverb by UDI DSP.
01 What Clearlight is
Clearlight is built around one refusal: it will not trade size for clarity.
Push a conventional reverb toward “huge” — long decay, large room, dense diffusion — and the source usually starts disappearing into it: consonants blur, transients soften, the mix reads as wash rather than space. Pull back toward clarity and the reverb shrinks with it. Clearlight’s whole architecture exists to give you both at once.
It sounds huge because the underlying tank — sharing DNA with Ghostlight Pro, UDI DSP’s flagship reverb — is a genuinely large, smooth, well-diffused space, with decay reaching 60 seconds, twice Ghostlight Pro’s ceiling. It stays intelligible because of a mechanism most reverbs simply don’t have: a dense early-reflections field built specifically to close the gap that makes a big tank swallow a source.
If you know Ghostlight Pro, Clearlight will feel like family — Size, Decay, Damp, Low Cut, Diffusion, Pre-Delay, Mix and Freeze all behave the way you’d expect — but it is not a re-skin. It’s a different topology built for a different job, and almost every control unique to it exists to serve the size-and-clarity goal.
At a glance
- An early field that closes the intelligibility gap — Shape, Spread and Early build a dense, velvet-noise pattern in the first 20–200ms and feed it directly into the tank, rather than adding a switchable ER algorithm on top of one.
- Decay up to 60 seconds — twice Ghostlight Pro’s ceiling, with the same early-field clarity at every length.
- A full dynamics chain on the finished tail — 3-band Dynamic EQ (static + level-reactive, each band with movable Freq and Q), Compression, Ducking, and an always-on Clipper safety ceiling.
- A stereo image that stays solid — Low-End Focus centres the bass of the tail below about 300 Hz, so a wide tail keeps its centre in the bass and stays wide everywhere else.
- Warm — a tube-and-tape hybrid waveshaper, even-harmonic and anti-aliased, with zero added latency.
- Lock the rhythm to the track — Pre-Delay can sync to the host tempo.
- Tail reported to your host — worked out from the current settings, so the reverb can finish in a bounce that includes the tail, a track freeze, or a host that pauses silent plugins. With Freeze on, the tail is reported as unlimited.
02 The mechanism: the early field
Reverb research points at something most reverb designs quietly ignore: it isn’t how much reverb you add that hurts intelligibility, it’s when its energy arrives. The first 50–160 milliseconds after a sound starts is close to the worst possible time to get energy from an intelligibility standpoint — if that energy arrives as a handful of loud, discrete reflections rather than a smooth build. That’s exactly what a large feedback-delay-network tank produces on its own: make the room big enough and the tank’s first echoes don’t arrive for 90–200ms, and they arrive sparse rather than dense. That gap is what reads to the ear as the source “disappearing into the room,” even though nothing unusual is happening on a meter.
Clearlight’s early-field stage sits in front of the tank specifically to close that gap: a dense, velvet-noise scattering pattern built at two scales — a coarse pattern across the whole 20–200ms window, and a finer grain smoothing each individual tap into a cluster rather than a click — so it reads as diffuse rather than as countable echoes. It feeds the tank and is heard directly, so it’s structurally part of the signal path, not a bolt-on effect switched in alongside it.
Shape sets the field’s envelope across its span — front-loaded (plate-like), flat (concert-hall-like, the default), or reversed (a swell). Spread sets how far it reaches in time. Early balances the early field against the tank in the finished signal — the single most audible control on the panel, since direct-to-reverberant balance is consistently shown to be far more audible than adjusting decay time itself.
Why this isn’t “just add early reflections”
Two things had to be true for this to work:
- The early field has to be genuinely dense, not scattered. A handful of taps that merely fill the time window still reads as discrete echoes. The velvet-noise construction — many small, randomly placed, sign-randomised impulses — scatters without the metallic ringing that evenly spaced taps or a short feedback cascade produce.
- Its contour has to be a real control. A dense field that’s always the same shape is still one more fixed algorithm. Different material and different rooms want different envelopes, which is why Shape and Spread exist.
Both Shape and Early stop short of their theoretical maximum. Two different reasons converged on the same range: pushed far enough, Shape’s own contour produces an audible slapback artifact, and separately, pushing Early toward its extreme trades the tank’s long tail for the early field’s own much smaller, closer character — working against the reason to reach for a huge cinematic reverb in the first place.
03 Signal flow
Early blends the early field directly into the output alongside the tank, in addition to feeding the tank as its input — the field is heard twice, once on its own terms and once as what excites the tank over time.
Freeze holds the tank’s decay indefinitely; everything downstream (Dynamic EQ, Warm, Width/Focus, Compression, Ducking, Clipper) stays live under Freeze, so a frozen tail can still be shaped in real time.
Nothing modulates inside the loop. Mechanisms that modulated something inside the reverb’s own feedback path were rejected during development because they produced audible artifacts on long tails — a wah-like colouration, an unwanted swell, a pumping sensation. The Dynamic EQ, Compression and Ducking do react to level over time, but only ever on the finished, one-pass wet signal, never inside the loop that produces the tail.
04 The panel
Two panels: Main (Space, Early Reflections, Tone, Output) for everyday use, and Advanced (Dynamic EQ, Dynamics & Color) reached via the button at the bottom left — the same drawer mechanism as Ghostlight Pro’s own panel. OUTPUT stays where it is on both, so you keep your levels and meters while you work.
Along the header sit Freeze, just after the name, and at the right the preset browser, the visualizer show/hide button, the menu (☰) with panel size, tooltips, the user guide, diagnostics and About, and the power switch at the far right.
The power switch
The circle at the top right is Clearlight’s bypass. It crossfades rather than hard-switching, and the engine keeps running while it’s off — switch back later and the tail is still there, quieter than you left it. The header stays lit while everything below it dims, because the switch to undo bypass lives up there.
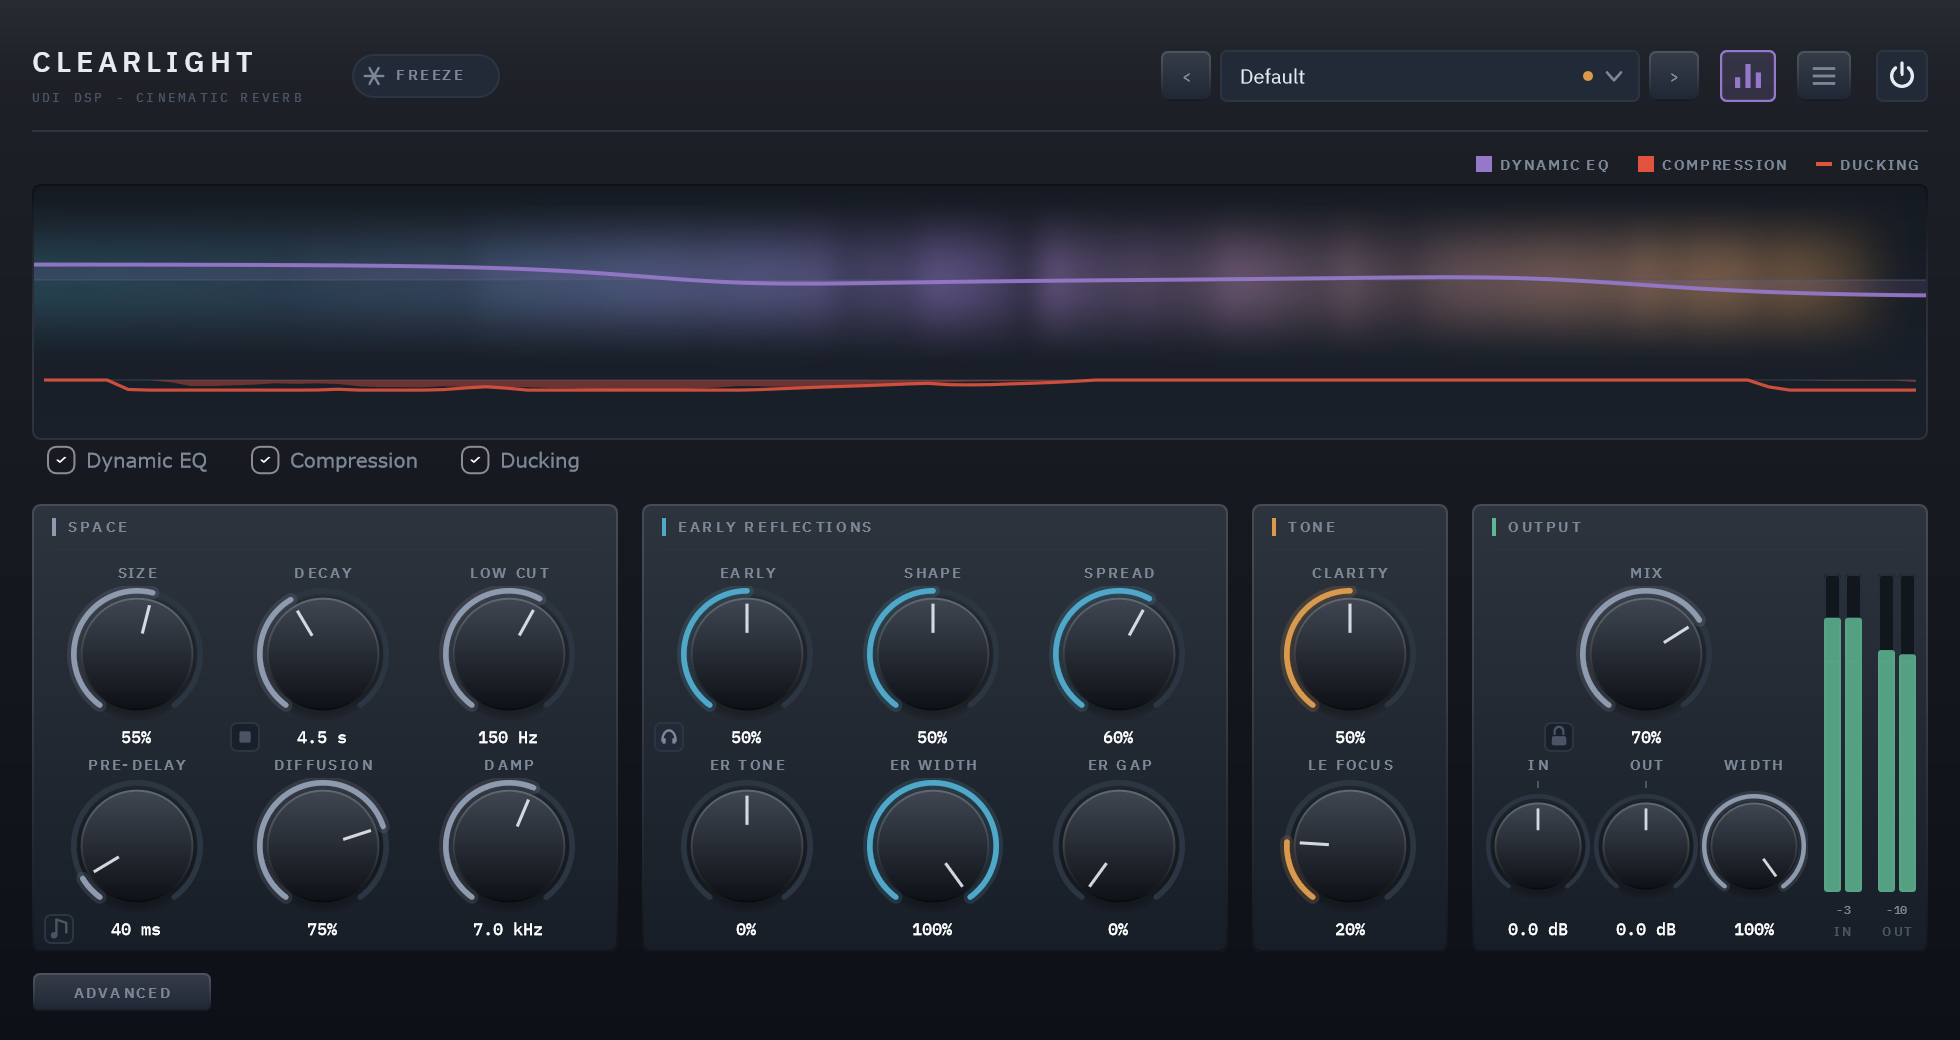
The front panel, showing the visualizer above the main section row.
Reading the display
The spectrum cloud shows the wet tail’s real energy, live. Above it, the Dynamic EQ overlay draws two lines per band: a translucent fill for the static shelf shape, and a solid line for what’s actually happening once Dynamic engagement reacts — so you can see the moment they diverge, not just two numbers.
Below the cloud, a gain-reduction strip traces the last three seconds of Compression and Ducking — Compression as a filled area, Ducking as the line over it. It shows motion rather than an instantaneous number on purpose: what makes a compressor or ducker legible is how it moves, and a single still reading throws exactly that away. A stage you have turned off draws nothing at all — no flat line along the top pretending to be a zero reading — and turning one down lets its existing trace scroll off to the left over the next three seconds rather than blink out, since that’s real history moving into the past.
A colour legend sits at the top right (a purple square for the Dynamic EQ curve, a red square for Compression’s fill, a red bar for Ducking’s line — the shapes match how each is actually drawn, since the two dynamics stages share a colour). Three checkboxes below the cloud let you isolate which overlay is contributing.
The visualizer can be hidden entirely via the icon button in the header (or the menu’s “Show Visualizer” item), which shrinks the window rather than leaving an empty gap.
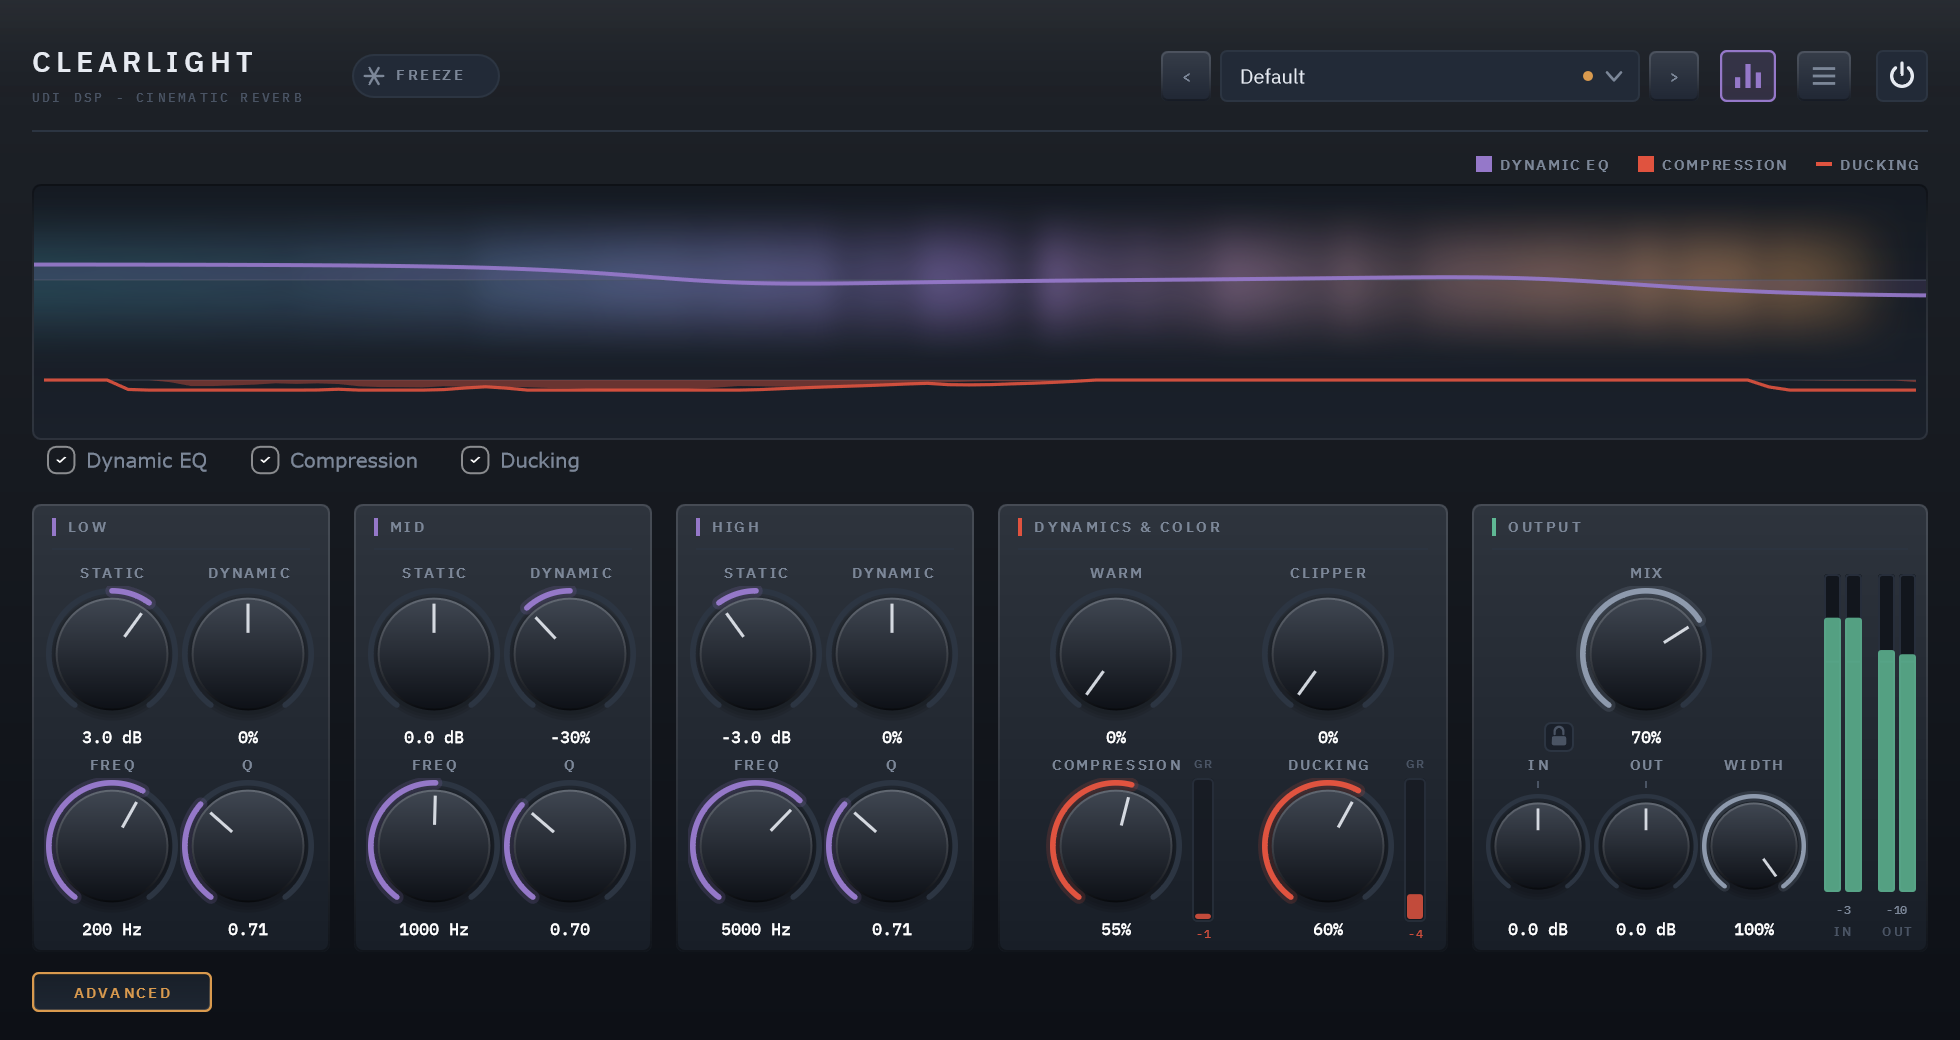
The Advanced panel: 3-band Dynamic EQ on the left, Dynamics & Color (Warm, Clipper, Compression, Ducking) on the right, with a GR meter beside each metered control.
Presets
The field in the header shows the loaded preset — 45 factory presets plus Default, compiled into the plugin and grouped into nine category submenus. See section 06.
Resizing
Drag the bottom-right corner. The panel holds its proportions anywhere between 75% and 150%.
05 Controls
Listed in the order they appear on the panel, left to right and top to bottom, so you can read this with the plugin open. All parameters are automatable from your DAW and saved with your project.
SPACE — The tank itself. Top left of the main panel.
Size
0 – 100% · default 55%
The physical size of the room. Larger sizes lengthen the tank’s delay lines; combined with the early field, this is where Clearlight’s “huge” comes from without the usual clarity cost of a large tank alone.
Decay
0.3 – 60 s · default 4.5 s
How long the tail takes to fall away (RT60) — twice Ghostlight Pro’s ceiling, for the tails Clearlight’s cinematic job asks for that a shorter reverb was never built to reach.
The stop button at the knob’s bottom-left empties the tail immediately, without waiting for it to die away. Sixty seconds is a long time to sit through between two settings, and that is the whole of what it is for: click it, and the next thing you play starts from silence. It fades the reverb out over about ten milliseconds rather than cutting it, so there is no click, and it never touches your dry signal — at Mix 0 the plugin stays bit-for-bit transparent right through a kill. Freeze stays on if it was on: you get an empty frozen tank, ready to be filled again. It is a real parameter, so a host can automate it to cut a tail at the end of a section.
Low Cut
20 – 500 Hz · default 150 Hz
How much low end reaches the tank at all — keeps a bass-heavy source from turning a long tail muddy.
Pre-Delay
0 – 500 ms · default 40 ms
A gap before the reverb starts, keeping the tail separated from the source’s own attack. Tap the small note-icon button to switch the same knob to tempo divisions (Free through 8 Bars) instead of milliseconds.
Diffusion
0 – 100% · default 75%
How smeared-together the tank’s own internal reflections are. Lower settings preserve more transient character in the tail itself — a trade-off, not just “more is better.”
Damp
1.5 – 20 kHz · default 7.0 kHz
High-frequency absorption inside the feedback loop: the corner above which the tail loses energy on every pass. Lower it for a darker, more distant tail. One-sided: it shortens the top without lengthening the bottom.
EARLY REFLECTIONS — The stage that makes the whole thing work (section 02). Early comes first because it sets how much of the early field is heard at all — everything else here shapes something Early decides the level of.
Early
0 – 100% · default 50%
The balance between the early field and the tank in the finished wet signal — the single most audible control on the panel. See section 02.
Shape
0 – 100% · default 50%
The envelope of the early field across its span: front-loaded (plate-like), flat (concert-hall-like, the default), or reversed (a swell). The closest thing Clearlight has to a “character” knob. See section 02.
Spread
0 – 100% · default 60%
How far the early field reaches in time, from a small-room span up toward the edge of where reflections stop fusing with the source and start reading as separate echoes.
ER Tone
-100% – +100% · default 0%
A tilt on the early reflections only. Positive lifts the top and trims the bottom; negative reverses it; centre is exactly flat, with the stage bypassed outright, so leaving it alone changes nothing.
This is deliberately not a second Damp, and the difference is the point. Damp governs how fast the tail’s high frequencies die away. ER Tone is applied after the early field has already fed the tank, so it changes what you hear directly from the early reflections without touching the tail’s own colour. Decoupling those two is what lets you build the sound a cinematic reverb is asked for most: a close, present, articulate source in front of a large, dark, distant room — ER Tone up, Damp down. Reverse both and you get distance instead, as though the first reflections came off soft surfaces nearby.
Because it only shapes the directly-heard early contribution, it gets quieter as Early does and does nothing at all at Early 0% — correct rather than a limitation, since at that setting there is no early field in the mix to colour.
ER Width
0 – 100% · default 100%
The early field’s stereo spread, from its natural width down to mono — early reflections only.
The Width knob in OUTPUT runs after the early field and the tank are blended, so it can only narrow both together. This narrows just the early reflections. On a sung lead: ER Width down, Width up — the voice’s own first reflections collapse toward the centre so it stays planted where the singer is, while the tank stays wide around it. It also survives a mono fold-down better, since the early field’s decorrelated detail is what a fold-down damages most.
It narrows only. The early field is already fully decorrelated, so there is no wider to go; pushing further would only buy an image that collapses harder in mono.
ER Gap
0 – 100% · default 0%
How long before the first reflection arrives — the strongest cue your ear has for how far away the walls are. A 0–200 ms delay on the early field. Spread already opened a small gap at the top of its travel, but tied to its span; this is independent of it, and at 0 leaves everything exactly as it was.
Unlike ER Tone and ER Width, this isn’t only a listening control. It’s applied before the early field feeds the tank — so moving the walls further away delays the reverberant buildup too, not just the reflection you hear directly. It stays audible even at Early 0%, where the other two correctly do nothing.
ER Gap and Pre-Delay are complementary, not two versions of the same thing. Pre-Delay sits inside the tank, so it moves the tail relative to the early reflections. ER Gap moves the early reflections and the tail follows them. Use Gap for how far away the walls are; use Pre-Delay to open space between the first reflections and the tail behind them.
Listen to Early
The small headphone button at the bottom left of the EARLY knob — mounted exactly the way Pre-Delay’s tempo-sync button is, because it’s the same kind of thing: a mode switch belonging to its knob rather than a control in its own right.
It mutes the tank and the dry signal entirely, so you hear only the early field’s own current contribution. Not a mix control — it exists for dialling in Shape, Spread, Early and ER Tone against real material without the tank or the source masking what’s changing.
TONE — Two optional assists, to the right of Early Reflections.
Clarity
0 – 100% · default 50%
An optional, gentle per-band assist that thins whatever band the source currently occupies more than its own long-term average, in the tail only, and stays live under Freeze. Clearlight’s clarity comes primarily from the early-field architecture in section 02 — this is a secondary, optional touch-up.
Low-End Focus
0 – 100% · default 20%
Centres the bass of the tail. Below about 300 Hz it pulls left and right together, redistributing energy rather than discarding it, so the low end gets solid instead of smaller — and nothing above 300 Hz narrows, even at 100%. It adds no bass: if the reverb starts to sound thin or mono, turn Focus down, not up.
The default, 20%, is just enough to stop the low end cancelling itself. Turn it up only if you want a firmer, more mono bottom.
OUTPUT — Stays put whichever panel you are on, so you keep your levels and meters while you work.
Mix
0 – 100% · default 35%
Dry/wet balance. The dry signal holds on through most of the knob and only gives way near the top, so even 60–80% keeps the source’s weight under the reverb instead of washing it out. Use 100% on a send.
The padlock beside the readout holds Mix, Input Gain and Output Gain where you put them while presets load. Audition a folder of presets with it on and each one arrives voiced as it was saved, but sitting at your balance and your levels rather than resetting all three every time. Everything else follows the preset, Width and ER Width included, so each step still sounds like the preset it is — only the blend and the two trims stay yours.
The lock belongs to the instance, not to the plugin: it saves with the project and is remembered when you reopen it, it is never carried inside a preset, and a preset you save while it is on still stores all three normally. Nothing is hidden — a locked control does not mark a preset as modified, so the dot beside the preset name keeps telling the truth.
Input Gain / Output Gain
±24 dB · default 0 dB
Utility trims at either end of the chain. In applies before anything else touches the signal, Out after everything including the Mix blend, so the meters beside them read the level the reverb actually receives and actually sends. While the padlock beside Mix is closed, presets leave both where you have them.
Each meter shows a falling bar per channel plus a numeric peak-hold readout in whole dB — held for about a second and a half before falling, so it’s the “how hot did that get?” figure rather than an unreadable value chasing the bar’s own decay. The Out meter also carries a clip lamp.
Compression and Ducking have their own gain-reduction meters beside their knobs, with the same kind of peak-hold number, shown only while there is real reduction to report. Those and the visualizer’s gain-reduction history all share one 24 dB scale, so a given height means the same thing wherever you read it.
Width
0 – 100% · default 100%
How far the wet tail spreads, narrowing by attenuating the side signal.
ADVANCED — Dynamic EQ — Behind the ADVANCED button, bottom left.
Dynamic EQ — Low / Mid / High, each Static + Dynamic + Freq + Q
Static ±12 dB · Dynamic ±100% · Freq per band · Q 0.3–4.0 · default 0 / 0%
Three bands — a Low shelf, a Mid bell and a High shelf — each with four controls. Static is a plain, always-on boost or cut. Dynamic reacts to that band’s own level once it gets loud — negative cuts (classic “de-mud”), positive boosts; the two stack. Freq moves the shelf corner or bell centre (Low 20 Hz – 1 kHz, Mid 200 Hz – 8 kHz, High 1.5 – 16 kHz), and Q sets the bell’s width and the shelves’ slope. Parallel and transparent at neutral, so the panel costs nothing until you move a band.
Watching it work. The display draws the Dynamic EQ in two layers: the translucent filled shape is the static curve — what you set — and the solid purple line on top is what the EQ is actually doing at that moment. With a band’s Dynamic set to cut, every loud phrase pulls the line down through the fill, and it rises back as the level drops.

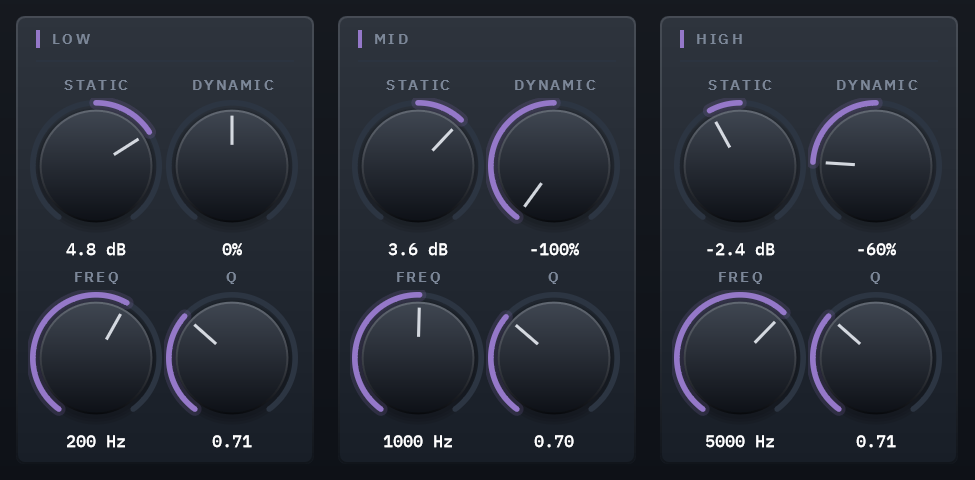
ADVANCED — Dynamics & Color — Paired by row: the two colour controls on top, the two metered dynamics stages below. None of these are required for Clearlight’s core job; they’re here because a reverb built for cinematic, mix-critical use benefits from having them close at hand.
Warm (Saturation)
0 – 100% · default 0%
Richness on the finished wet tail, working on the two fronts that “warm” actually means in an analogue signal path.
Even harmonics. A symmetric waveshaper can only produce odd harmonics — what an edgy, aggressive distortion is made of. Warm generates the second harmonic explicitly, so the even ones dominate: measured, the 2nd sits 16 dB above the 3rd, and the high-order harmonics that read as grit are essentially absent. Anti-aliased, with zero added latency.
Low-mid body. A gentle lift around 300 Hz and a soft rounding of the very top — the tonal half of warmth, which no amount of harmonic work substitutes for.
Recolours the tail rather than making it louder. For a colour that announces itself instead, reach for Clipper.
Clipper
0 – 100% · default 0%
Two things in one control, genuinely last in the chain.
A safety ceiling that’s always in circuit — it guarantees the signal can never exceed full scale regardless of what’s dialled in elsewhere, which matters because the Dynamic EQ’s boosts stack and Compression’s automatic makeup reaches +36 dB. At its default it is bit-transparent, not merely quiet: below its threshold the stage is mathematically the identity function, so ordinary tail levels come back sample-for-sample unchanged. It only begins to act as the signal approaches full scale.
Clearlight’s drive control, turned up — and the deliberate opposite of Warm. Where Warm is even-harmonic and stays out of the way, Clipper is purely odd-harmonic and gets louder as you push it (no makeup gain, so more drive means more level as well as more character).
Compression
0 – 100% · default 0%
Bus-glue compression on the wet tail, for a denser, more sustained-feeling decay.
Ducking
0 – 100% · default 0%
Sidechains the wet tail to the dry source’s own envelope — the tail ducks while the source plays and swells back when it pauses, so ambience doesn’t wash out dialogue or a lead line.
HEADER — Along the top of the panel.
Freeze
Holds the reverb tank indefinitely. Everything downstream stays live, so a frozen tail can still be shaped with Width, Focus, Dynamic EQ and the rest.
06 Presets
45 factory presets ship with the plugin, plus Default — which holds no settings of its own, so loading it returns every control to its factory value. A fresh instance opens on Default, and it’s the way back to zero.
Three things a preset deliberately never moves, Default included: Bypass, Freeze, and anything you have locked with the padlock beside Mix. The first two latch — a preset arriving with either one held would read as a plugin that had stopped working rather than as a setting — and the third is yours by definition.
They’re organised into nine categories by instrument and use — Vocal, Guitars, Strings, Brass, Cinematic, Ambient, Drums, Keys and Sound Design, five presets each — and each category appears as its own submenu in the header’s preset field. Selecting any preset resets every other control, so they’re absolute starting points rather than deltas; the arrows either side of the field step through the whole bank in order and wrap around.
Clear Tail on Preset Change, in the main menu, is off by default. Turn it on and every preset change empties the tail first, so each one is heard from silence instead of arriving over the last one still ringing. Like the padlock it belongs to the instance: it saves with the project, and every new instance starts with it off. It applies however the preset changes — the field, the arrows, or your host’s own program list, whether or not the panel is open.
07 Technical specifications
| Format | VST3 (Windows x64), Standalone app included — AU / macOS not yet available |
| Channels | Mono or stereo in, mono or stereo out |
| Latency | 0 samples |
| Bypass | The power switch at the panel’s top right — a short crossfade, engine kept running so the tail is still decaying when you switch back |
| Reverb engine | 8-line FDN, shared core with Ghostlight Pro, plus a dedicated velvet-noise early-field stage |
| Decay range | 0.3 – 60 seconds |
| Dynamics chain | 3-band Dynamic EQ (static ±12 dB + reactive, movable Freq and Q per band), Compression, Ducking, always-on Clipper |
| Live parameters | 41 |
| Factory presets | 45, in nine categories |
| CPU (measured) | 7.03% of one core idle, 8.61% worst case — everything maxed — @ 48 kHz stereo, 512-sample blocks |
| Tail reporting | Worked out from the current settings and reported to the host, so a bounce, a track freeze or a host’s silence-suspend lets the reverb ring out in full: the time the tail takes to fall 140 dB, erring long — about 19 s at the defaults, three minutes at Decay 60 s, and longer with Knee up (the chamber rings up to six times Decay) or the dynamics working hard — and infinite while Freeze holds the tank |
| Shares with Ghostlight Pro | Reverb core, licensing/activation, UI toolkit — the same underlying craftsmanship, built for a different job |